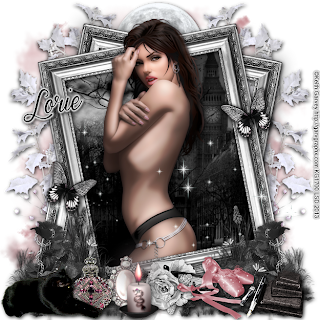
Tuesday, December 3, 2013

PTU Tag

Breathe Me


PTU Tag
Hello I am finally back with a new tag this one I used a the Artwork of Keith Garvey you need a license to use his work.I used a gorgeous PTU Scrapkit called "Breathe Me" By Tasha's Playground and you can buy it here at Digital Chaos I also used a mask and font of choice.Thanks for looking.
OXOXO

Tuesday, October 15, 2013

CT Tag "Golden Dreams"

~Golden Dreams~


  ~PTU Golden Dreams~

Hello I am back today to show off my gorgeous tag I made using a beautiful kit From Kittie's Sinful Designz called Golden Dreams you can find more of her awesome kits at Mystical Scraps I also used the Gorgeous Art Work By Zlata Ma I bought it at Scraps and The City but he is no longer there.But you can find his other Art at Pics For Design.Thanks for looking. oxoxo :)

Thursday, October 3, 2013

PTU CT Tag & Tut Spooksville

~Spooksville~


PTU CT Tag & Tut 
~Spooksville~

 Hello  I have a new Tut for you all today it's called Spooksville for this tag I used a Scrapkit By Kittie's Sinful Designz called Spooksville and you can buy it here at Mystical Scraps I also used the gorgeous Art work of Keith Garvey you need a license to use his Art you can buy here at Garvs Girls 


I also used a Template # 99 from Toxic Desires.
Supplies:
Tube Of Choice
Scrapkit -Spooksville
Template- # 99 From Toxic Desires
Mask Of Choice
Font Of Choice I Used -Blackwood Castle


Lets Begin Open up all your supplies in PSP Open up the Template and  hit Shift D to make a copy and then close the Original X out Credits, Stars and Wordart but if you feel like using them you  may as well.
Add your mask  of Choice I used paper 6 with the Mask I used put your mask layer right above the Background Layer.
Ok on Circle Layer go the Selections>Select All>Float >Defloat and Open up Paper 2 Resize and add paper as new layer then on circle Layer go Selections>Invert Than Back on Paper Layer hit the Delete button. Now you will repeat these steps on the Template
Web Layer - Paper  1
Rectangle - Paper 8
Circles- Paper 12
Then on Circles Layer you repeat the same steps as above but this time you will add a  Close Up Image of your Tube and then after you have put both your images you will make a duplicate it and on the Top Copy Layer Of Close Up add these settings Blend Mode :Luminace Legacy on the Bottom Layer of Close Up Image These Settings Blend Mode: Screen and Opacity at - 40%  and then on your Paper Circle Layer I added a Gradient Glow around it just to make it Pop a little.
 and OK Now the fun part starts as always!Time to get creative and have some fun!!Simply Resize Add your Main Tube and any of the elements you would like to use and place them all as new layers to your liking all around the Template and Tube.Use your deformation tool to rotate if needed.Make sure to sharpen & dropshadow all the Elements.Add your Artist © and License # and your Name you can see mine above to help have fun and make it your own!As always mine is just to help and guide.X out the bottom white layer before savingto have a transparent Background Save as PNG.Hope you enjoyed my tutorial & thanks for trying it!If you would like to E-Mail me your results at loriescreations@hotmail.com OXOXO


PTU Tag

~Rebel Girl~


Hello This Tag I made tonight using a gorgeous Scrapkit By Designs By Joan called Rebel Girl I bought the Kit from Scraps And The City I also used the gorgeous work from Ismael Rac you need a license to use his art you can buy his work here at his store at XeracX Store thank you for looking oxoxo :)

PTU Tag

  ~Bat Wings & Skulls~


For this tag I used a PTU Kit by Kristin at Toxic Desires called Bat Wings & Skulls I bought at the  The PSP Project and a Template From Toxic Desires also and a Tube from Ismael Rac you need a license to use his work.you can buy his work here at XeracX Store
Thank you for looking.oxoxo :)

Thursday, September 26, 2013

PTU Blue Love CT Tag & Tut


  CT Tag & Tut
PTU Blue Love

Hello I am here with a new Tag I made using a gorgeous PTU Scrapkit from Kittie's Sinful Designz called Blue Love and it can be bought at Mystical Scraps I also used the Beautiful Artwork of Keith Garvey this Tube was an Exclusive at his store Garvs Girls you need a license yo use his work.

My Supplies:
A tube of choice.
 Font of choice I used: Scriptina
A Mask of choice
Plugin:  Tramages > Tow the Line

Lets Begin!!
Open your supplies in PSP. Open a new transparent
canvas 625x625  you may resize/crop later.
Floodfill white. Add another raster layer.
Selections>select all.
Resize and paste  paper 5 into selection.
Apply your mask, and on your
layers pallette merge mask group.
Select none.Then open Frame Element 20  and add as a new layer.
Grab your magic wand and click inside frame.
Selections>modify>expand  2
Resize and paste  paper 8  Selections>invert>delete.
Drag the paper under the frame.Select none.
Now on paper Layer go to Effects>Plugins>Tramages>Tow The Line
Default settings. OK Now the fun part starts as always!
Time to get creative and have some fun!!
Simply Resize Add your Main Tube and
 any of the elements you would like to use and place them
all as new layers to your liking all around the frame and Tube.
Use your deformation tool to rotate if needed.
Make sure to sharpen & dropshadow the Frame your Tubes and all your Elements.
Add your Artist © and License # and your Name
  you can see mine above to help have fun and make it your own!
As always mine is just to help and guide.
X out the bottom white layer before saving
to have a transparent Background Save as PNG.
Hope you enjoyed my tutorial & thanks for trying it!
 If you would like to E-Mail me your results at loriescreations@hotmail.com
OXOXO

Thursday, August 8, 2013

PTU Tag

~Dragon Power~


Hello I made this tag last night I used  the gorgeous Art Work of Danny Lee you need a license to use his Art you can find his work here at SATC I also got there a beautiful matching PTU Scrapkit called Dragon Power by Bibi Collections it's a awesome kit tons of elements to play with.I also used a mask and a font of choice I used Chinese Calligraphy Thank you for looking oxoxo :)

FTU Cluster Result

 ~Dark Romance~


 Hello I made this quick taggie the other day using a gorgeous FTU Cluster Frame by Crazy Fantasy Babbelstubb called Dark Romance and I used the Beautiful Art Work of Ismael Rac and I used a Mask and a Font of choice I used 2 Baltimore DNA  Thanks so much for looking. oxoxo :)

Thursday, August 1, 2013

FTU Cluster Result

~Little Wish~


Hello I made this Tag with a beautiful FTU  Cluster Frame By Chilipepper Spiced called Little Wish
I also use the Artwork of Verymany you must have a license to use her work I bought her at SATC I also used a Mask of choice and the Font I used is called 1 Bicarbonate DNA Thank you so much for looking! oxoxo :)

PTU Tag

~The Longing~


Hello I made this PTU tag with a Tube that I won By Zindy S.D. Nielsen you must have a license to use her work.I also use a Gorgeous PTU Scrapkit From Whisperd Designz called Dorchadas 
Font I used was Choppin Script Thank You.
oxoxo

Tuesday, July 23, 2013

Creative Misfits Exclusive

~Pink Rebel~


Hello for this tag I used a Template a Gorgeous Exclusive Tube By Keith Garvey you can only get at Creative Misfits Forum.I also used a awesome Scrapkit By Kristin from Toxic Desires called Pink Rebel you can buy it at SATC I used a a Font of choice. Thanks for looking. oxoxo :)

FTU Cluster Frame Results

~Gangsta Back To Black~


Hello for this tag I used a Gorgeous FTU Cluster Frame from here Disturbed Gaby and I
used the gorgeous Art Work of Keith Garvey you must have a license to use his work.I also used
some elements from Bibi Collections Kit called Back To Black you can buy the kit at SATC
Thank you so much for looking. oxoxo :)

FTU Cluster Frame Result

~Steampunk Girl~


I used a FTU Cluster Frame From BabbleStubb And I used the gorgeous Art Work Of Barbara Jensen
You need a license to use her work.And I used a mask and Font Of Choice.Thank You.

Saturday, June 29, 2013

PTU Vampire Widow

~Vampire Widow~


PTU Tut
 Hello I am here with another Tag I made this one was so fun to make!!I used the gorgeous Art Work
of Barbara Jensen and Beautiful PTU Scrapkit By Bibi Collections called Vampire Widow you can buy at SATC and a Mask and Font of choice I used Noel Black  Thanks for looking!!! <3 oxoxo :)
 
 Lets Begin!!
Open your supplies in PSP. Open a new transparent
canvas 625x625  you may resize/crop later.
Floodfill white. Add another raster layer.
Selections>select all.
Resize and paste  paper 2 into selection.
Apply your mask, and on your
layers pallette merge mask group.
Select none.Then open Frame Element 2  and add as a new layer.
Grab your magic wand and click inside frame.
Selections>modify>expand 5
Resize and paste  paper 1 Selections>invert>delete.
Drag the paper under the frame.Select none.
Resize element 43 and add as a new layer to go just outside the frame
Now add your Tube of choice Place her how you would like her.
OK Now the fun part starts as always!
Time to get creative and have some fun!!
Simply Resize and add your elements of choice
and place them all as new layers to your liking all around the frame.
Use your deformation tool to rotate if needed.
Make sure to sharpen & dropshadow the Frame and all your Elements.
Add your Artist © and License # and your Name
 Have fun you can see mine above to help or make it your own!
As always mine is just a guide.   :)
X out the bottom white layer before saving
to have a transparent Background Save as PNG.
Hope you enjoyed my tutorial & thanks for trying it!
 If you would like to E-Mail me your results at loriescreations@hotmail.com
OXOXO
 Written by Lorie-June 29, 2013
Any resemblance to another tutorial is purely coincidental.


Here is some stunning results By Sky
I absolutely love it!!
Thanks so much for making me one and doing my tut.
OXOXO


Tuesday, June 25, 2013

PTU Girl Next Door

~Girl Next Door~


Hello this tag was easy and fun to make I used a gorgeous Tube by Keith Garvey
and a beautiful Scrapkit By Bibi's Collection called Girl Next Door I bought it at SATC  I also used a Template By Divine Intentions

Also I wrote a quick way to make a quick Avatar to match your tag  :)

How To Make Avatar
Open a new image 150 X 150 or any size you would like
Copy and paste your Finished Tag or a Close Up Tube  and move your Tube into perfect view the way u want it to look.
then on the bottom layer go to Selections>Select All>Selections>Modify>Select Sections Borders>  Settings :Both sides  Checked  - Anti alias  checked - Border width 4
Now Make a new Layer  this should be your 3rd Layer now and it should be on the Top flood this layer with your color of choice.While still selected go to Adjust >Add or Remove Noise > Settings : Uniform Checked -Monochrome Checked - Noise 40  Then go to Adjust > Sharpen
Then just add your copyright & License Info and your Name or Letter in your first name Avatars are not allowed to be Blank as stated in Artists Terms Of Use 
Thanks  oxoxo :)

Tuesday, June 18, 2013

FTU Cluster Results Hottie

~Hottie~


Hello I made this tag so easy with an awesome FTU Cluster Frame By Julies Jazz Designz Called Rock Hard I also used the gorgeous and sexy Art Work of Keith Garvey and I used a Mask and a Font of choice so easy. oxoxo :)

Friday, June 14, 2013

PTU Finding Me

~Finding Me~


For this tag I used the beautiful Art Work of Barbara Jensen and I used a Scrapkit 
from Whisprd Designz  call Finding Me and I used a Mask very easy  :)

Wednesday, June 12, 2013

~Pink Geisha~


Hello I made this tag using the gorgeous Art Work of Danny Lee you can find his work at SATC 
I also used a FTU Cluster Frame I got from here Disturbed Gaby and I used a Mask and the Font I used is called Kingthings Conundrum  :)

Tuesday, June 11, 2013

~Vamp Goth~


This tag I used the Art Work Of Elias Chatzoudis and I used a gorgeous PTU scrapkit By Tasha  from Tasha's Playground  Called Vamp Goth I also used a Mask and a Template
~Solitude~


To make this tag I used the beautiful Art Work of Keith Garvey and I used a gorgeous PTU Scrapkit
By Whisperd Designz Called Solitude and a Mask that's it it was pretty easy  <3 oxoxo :)

Friday, June 7, 2013

PTU Tut Unseelie Magick


Hello 
I am here with a new Tut
If you are using or doing my tuts please
Remember to leave some luv Please!!You can also E-mail me
Your results I would love to see them.
Enjoy! & Have A Blessed Day!
You must have a working knowledge of PSP.
I am using PSP 9 but any version will be fine.
I am using the beautiful artwork of Barbabra Jensen
You must purchase a license to use her Art This Tube is an Exclusive at CDO 
And the Scrapkit I am using is from Killer Kittys Scraps and its called
Unseelie Magick.
 
My Supplies:
A tube of choice.
 Font of choice I used is Kayleigh
A Mask of choice
Plugin: Xero - Radiance & Porcelain effects

Any Scrapkit would work fine in this Tut
Lets Begin
 Open a new transparent
canvas 650x650, you may resize/crop later.
Floodfill white. Add another raster layer.
Selections>select all.
Resize and paste paper 10 into selection.
Apply your mask, and on your
layers pallette merge mask group.
Select none.
Then open Frame 3  and add as a new layer.
Grab your magic wand and click inside frame.
Selections>modify>expand 4
Resize and paste  paper 7  Selections>invert>delete.
Drag the paper under the frame.Select none. And now on the Second box
of the Frame make sure to click all sides of it holding the shift button then
Selections>modify>expand 4
Resize and paste  paper 5   Selections>invert>delete.
Drag the paper under the frame.Select none.
Now on the Red Paper layer  add element resize (Broken Glass)
to your liking.On that same layer resize sharpen & add your Close Up Image
now on this you will use your Xero effect to your tube
Effects>Plugins>Xero>Porcelain settings are  50, 128, 128, 0 ,0 ,97
and then Repeat the same steps above but this time go to
Radiance and use this settings 128, 50 ,128, 97
Now still on your Close up image Duplicate it and on the bottom layer
add these settings Opacity 88% and Blend: Screen
 And back on the top layer the copy Blend :Luminance
OK Now the fun part starts as always!
Time to get creative and have some fun!!
Simply Resize Add your Main Tube and
 any of the elements you would like to use and place them
all as new layers to your liking all around the frame and Tube.
Use your deformation tool to rotate if needed.
Make sure to sharpen & dropshadow the Frame your Tubes and all your Elements.
Add your Artist © and License # and your Name
  you can see mine above to help or make it your own!
As always mine is just a guide.
X out the bottom white layer before saving
to have a transparent Background Save as PNG.
Hope you enjoyed my tutorial & thanks for trying it!
 If you would like to E-Mail me your results at loriescreations@hotmail.com
OXOXO

 Written by Lorie- June 7, 2013
Any resemblance to another tutorial is purely coincidental.

Wednesday, May 8, 2013

 PTU ~Time Stand Still~


Hello!
I am here with my very first Tut
If you are using or doing my tuts please
Remember to leave some luv Please!!You can also E-mail me 
Your results I would love to see them.
Enjoy! & Have A Blessed Day!
You must have a working knowledge of PSP.
I am using PSP 9 but any version will be fine.
I am using the beautiful artwork of Keith Garvey
You must purchase a license to use his art.I am using a Gorgeous Scrapkit called Time Stand Still From Whisprd Designz

My Supplies:
A tube of choice.

 Font of choice I used Lavishly Yours ROB
A Mask of choice
Plugin: Xero - Fritillary

Any Scrapkit would work fine in this Tut

Lets Begin!!
Open your supplies in PSP. Open a new transparent
canvas 700x625, you may resize/crop later.
Floodfill white. Add another raster layer.
Selections>select all.
Resize and paste  paper 3 into selection.
Apply your mask, and on your
layers pallette merge mask group.
Select none.Then open Frame 9  and add as a new layer.
Grab your magic wand and click inside frame.
Selections>modify>expand 5
Resize and paste  paper 8 Selections>invert>delete.
Drag the paper under the frame.Select none.
On paper layer Add Xero - Fritillary with settings at 5, 70, 50 and 30

Then on the Frame layer Duplicate it and on the bottom Frame
 go to Adjust>Blur>Glaussian Blur  Radius 15.00
Next Open Element 30 and Resize and add as a new layer to the top corner of frame place to your liking then Duplicate and image>mirror.
OK Now the fun part starts as always!
Time to get creative and have some fun!!
Simply Resize and the leaves & flowers & butterflies
and any other remaining elements and place them
all as new layers to your liking all around the frame.

Use your deformation tool to rotate if needed. 
Make sure to sharpen & dropshadow the Frame and all your Elements.
Now add your tube of choice and place
her where you want her to go.Add your Artist © and License # and your Name
  you can see mine above to help or make it your own!
As always mine is just a guide.
X out the bottom white layer before saving
to have a transparent Background Save as PNG.
Hope you enjoyed my tutorial & thanks for trying it!

 If you would like 
to E-Mail me your results at loriescreations@hotmail.com
OXOXO

 Written by Lorie-May 5, 2013
Any resemblance to another tutorial is purely coincidental.


Thursday, May 2, 2013


~Dorchadas Tag Set~

I used a gorgeous Tube From Barbara Jensen  and a sexy dark Scarpkit By Whisprd Designz  called Dorchadas .


~Angelic Tag Set~

I used a gorgeous tube from CDO By Anna Marine and I used a Gorgeous Kit By Whisprd Designz called Angelic its a awesome kit with lots of elements. oxoxo :)

Hello my name is Lorie welcome to my Blog I will be posting my tags that I make here and I also hope to posting some Tuts here soon.I am new to this and I am trying to figure it all out on my own. LOL :D

My Header and Avatar were made by Me

Keith Garvey Tag Is Called Just Here Made By Me I Used a Tube By Keith Garvey and a Scrapkit called Just Here From Whisprd Designz